This guide is based on Eclipse 3.3. Lightwolf was tested on Eclipse 3.4 and works, but the steps to download and install are a bit different, since this mechanism was changed on Eclipse 3.4. Hence you should get no trouble to download and install on Eclipses newer than 3.3.
First download and install the Lightwolf Plug-in for Eclipse from the following update site:
http://lightwolf.sourceforge.net/updates/
You can accomplish this by going to the Find and Install menu of Eclipse:
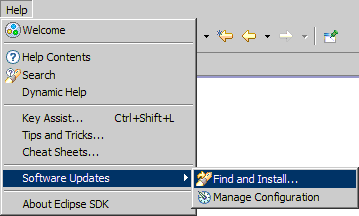
Then you choose Search for new features to install and click on the New Remote Site... button. This will bring up a dialog box, on which you can type the following values:
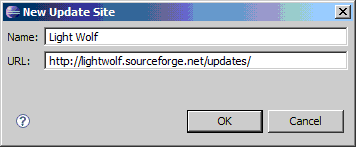
Once you clicked OK, check only the Lightwolf item on the list box, and then click Next . Wait for the server response and choose the Lightwolf Plug-in. There should be only one version available. Read and accept the license (if you want), wait for the download to finish, and restart Eclipse.
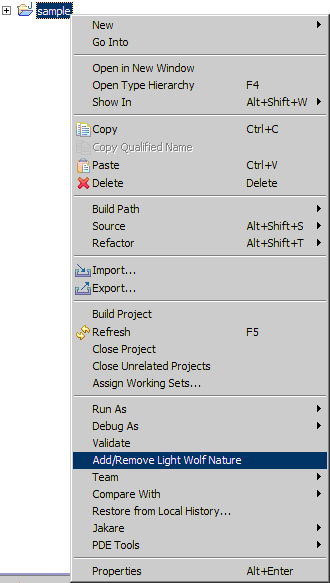
Now that you are back on Eclipse, right-click on any Java project, and choose the Add/Remove Lightwolf Nature option:
You should get a message about the success of this operation:

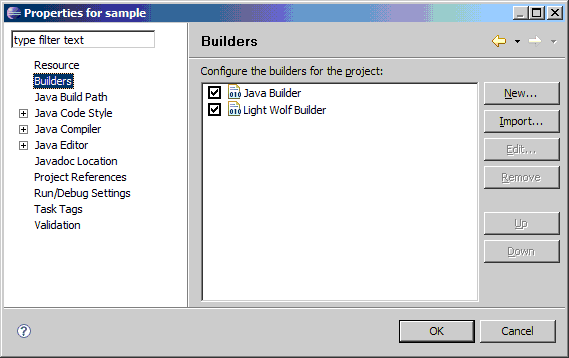
Before you can play with utilities, check if the project builder page is listing the Light Wolf Builder . Such builder must always be the last builder in the list:
Also check if the Lightwolf Library was added to the project's build path:
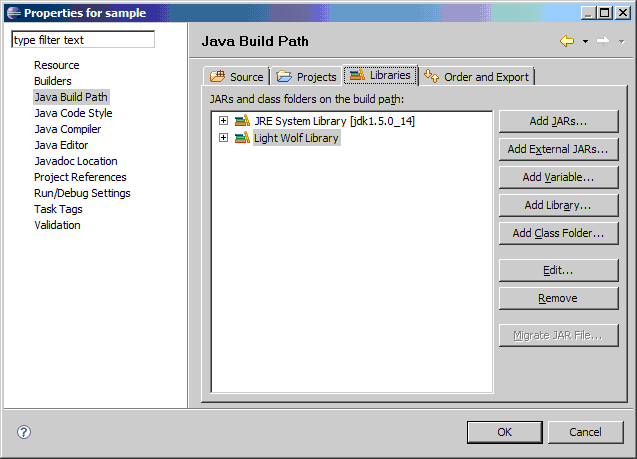
If you accidentally remove this library, you can add it again by using the Add Library... button on that page.
Now let's make the test. Create a new class and paste a sample from the home page . Then you can run it as ay ordinary Java class. You can simply right-click the class in Eclipse's Package Explorer, and choose Run As , Java Application . If your choice for a sample was the fork/merge , you should be looking to something like this:
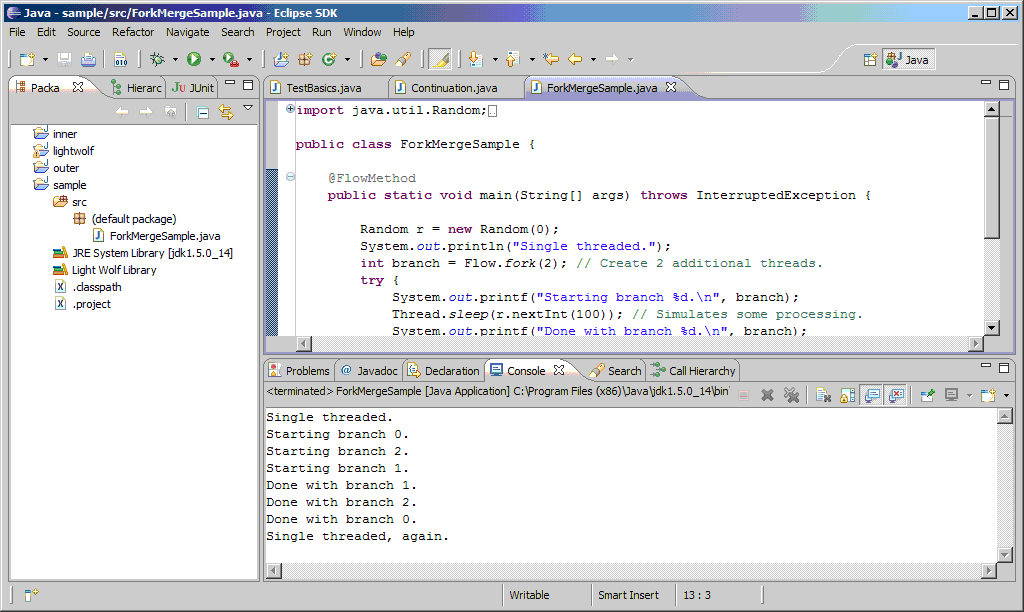
That's all. Now you should be able to use Lightwolf utilities within your project's code.